
Table of Contents
- Assess Your Heel Fit Before Stretching
- The Hair Dryer Method to Stretch Shoes
- Stretching the Heel of a Shoe with Damp Materials
- Using the Freezer Method for Toe Box Expansion
- Wearing Thick Socks to Break In Tight Heels
- Building a Homemade Shoe Stretcher
- Do Tight Shoes Stretch Over Time on Their Own?
- When Not to Stretch Heels at Home
- Frequently Asked Questions
Last Updated: October 18, 2026
Assess Your Heel Fit Before Stretching
Before you stretch tight heels, pinpoint exactly where they pinch, different problem areas need different solutions.
Identify where the shoe feels tight
Does the heel counter dig into your Achilles, the toe box squeeze your toes, or the side of your foot feel compressed? Location matters, because each stretching method targets a different pressure point.
Wear the heels around the house for 15-20 minutes and note the exact spots that hurt.
Check the shoe material
Leather stretches more easily than synthetics; suede needs gentler handling than patent leather, and satin or mesh require extra caution.
Check the shoe's tag if available. If unsure, test any method on a less visible area first.
The Hair Dryer Method to Stretch Shoes
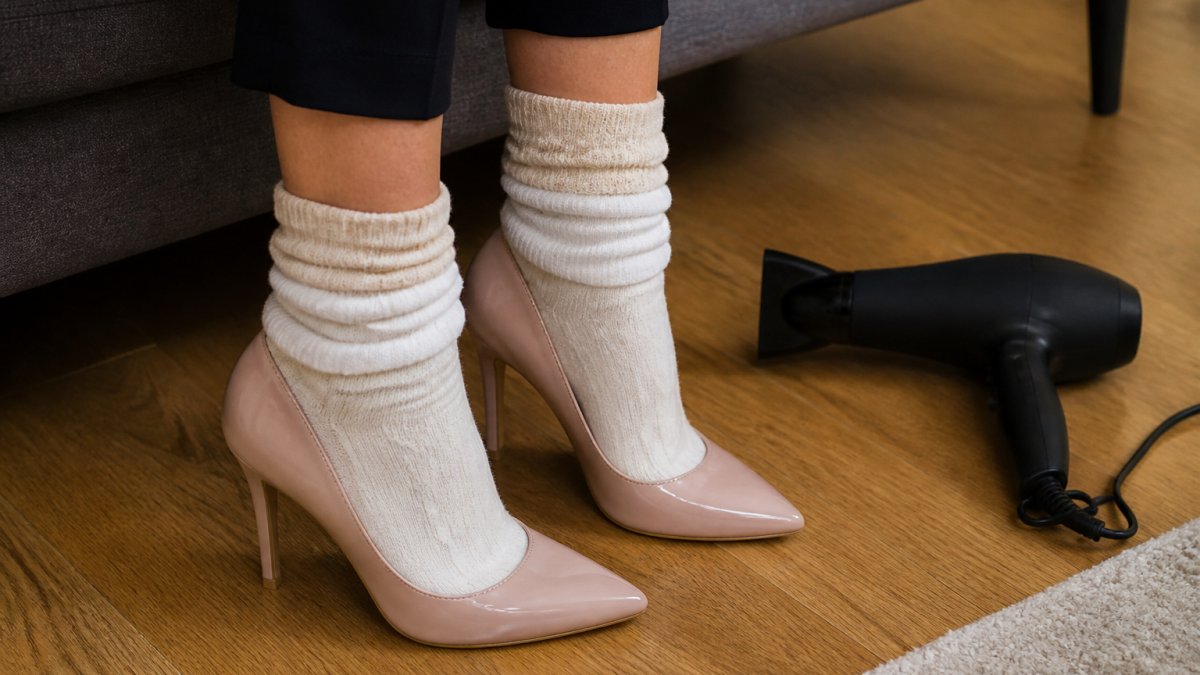
The hair dryer method uses heat to soften shoe material so it expands slightly, best for leather and some synthetics.
Here's how to do it:
- Put on thick socks (two or three pairs)
- Slip your feet into the tight heels
- Set your hair dryer to medium heat
- Direct warm air at the tight areas for 30-60 seconds
- Keep the dryer 6-8 inches away from the shoe
- Move it around so one spot doesn't get too hot
- Flex your foot and walk around while wearing the heels
- Let the shoe cool while you're still wearing it
- Remove the heels and let them cool completely
Heat softens the material, your foot's pressure expands it, and cooling while worn sets the new shape.
Don't use high heat, it can damage delicate materials or weaken glue. Test the temperature with your hand first.
Stretching the Heel of a Shoe with Damp Materials
Most stretching advice targets the toe box, but with tight heels the pressure usually sits elsewhere: the heel counter digging into your Achilles, the back collar rubbing the ankle bone, or the instep strap cutting across the top of the foot. Those zones need targeted treatment, because the heel counter is reinforced to hold its shape and resists stretching more than any other part of the shoe.
First, pinpoint which heel problem you have
Before you dampen anything, diagnose:
- Heel counter pressure (back of the shoe): The rigid cup behind your heel presses into your Achilles tendon. Common in new pumps and pointed-toe heels.
- Collar rubbing (top edge): The rim of the shoe saws at your ankle bone. Often a padding problem more than a size problem.
- Instep tightness (top of the foot): The vamp or strap presses down across the top of your foot. Common in strappy heels and slingbacks.
Damp-material stretching works best on the first two. It does little for instep straps and nothing for width.
The damp-stuffing method, done correctly
This softens the heel counter so it relaxes outward a few millimeters, enough to stop the digging without collapsing support.
- Dampen, don't soak. Wring out a washcloth or a few sheets of newspaper until it is barely damp to the touch, no drips. Excess water is the number-one cause of water stains and weakened glue.
- Stuff the heel counter firmly. Pack the damp material into the back of the shoe, pushing it into the curve of the heel counter so it presses outward against the lining.
- Add counter-pressure. Wedge a rolled dry sock or a small towel into the toe area so the shoe doesn't just slide forward instead of expanding at the back.
- Wait 8-12 hours. Overnight is convenient. Check at the 8-hour mark; if the material has dried out, re-dampen and continue.
- Remove the stuffing and air-dry. Never apply direct heat to a damp shoe, let it dry at room temperature, away from radiators and sunlight.
- Test in short intervals. Wear the heels for 10-15 minutes with thin socks, then check for hot spots before committing to a full evening.
What about the freezer for the heel?
The freezer method is often recommended for heels, but it's a poor fit for the heel counter. Ice expands roughly uniformly, so inside a narrow heel cup it pushes the counter down and inward at the sides as much as outward at the back, often distorting it.
For cold-assisted heel stretching, chill the shoe 10-15 minutes in the refrigerator (not the freezer) to make the material more pliable, then wear it with thick socks as it returns to room temperature. The shape sets as it warms.
The damp-cloth-plus-pressure method for stubborn counters
For heel counters that won't budge, combine moisture with sustained pressure:
- Dampen the inside of the heel counter with a barely damp cloth.
- Insert a rounded object that matches the curve of your heel, a rolled magazine, a small jar wrapped in a sock, or a purpose-made wooden heel stretcher if you have one.
- Apply gentle outward pressure by wedging a second rolled sock between the object and the counter.
- Leave 8-12 hours, then air-dry completely before wearing.
Slower than heat, but the gentlest option for leather heels you care about, and it targets the exact spot that causes most heel pain.
Using the Freezer Method for Toe Box Expansion
Tight toe boxes respond well to the freezer method. Water expands as it freezes, creating gentle outward pressure.
Here's the process:
- Fill a plastic bag with water (seal it completely)
- Place the bag inside the toe box area
- Put the shoe in the freezer overnight
- The water freezes and expands (Water Density)
- Remove the shoe and let it thaw at room temperature
- Take out the bag once the ice melts
- Try on the shoe
This works for most materials. The expansion happens gradually as the water freezes, so it's gentler than forcing your foot into a tight shoe.
Never use this method on shoes with delicate embellishments or glued-on decorations. The moisture and temperature changes can damage them.
Wearing Thick Socks to Break In Tight Heels
Thick socks create padding and pressure that stretches the shoe gradually, slower, but less stress on the material.
The process is simple:
- Put on two or three pairs of thick socks
- Wear your tight heels around the house
- Start with 30 minutes
- Gradually increase the time each day
- Wear them for 1-2 hours daily
- After 5-7 days, try the shoes with normal socks
Your foot's warmth and the sock layers create consistent pressure, and it works for all materials since it relies only on time and gentle pressure.
It takes patience, no results after one wearing, but it's the safest method for delicate shoes and provides gradual, lasting stretch.
Building a Homemade Shoe Stretcher
A DIY shoe stretcher costs nothing and works surprisingly well from materials you likely have at home.
Simple method:
- Take a wooden spoon or dowel
- Wrap it in a damp cloth or newspaper
- Insert it into the toe box area
- Wrap the handle with fabric so it doesn't slip out
- Leave it overnight
- Remove it the next morning
The wrapped wood absorbs moisture and gently pushes the shoe outward, while the damp cloth softens. Leave it in 8-12 hours.
For a heel stretcher, stuff a rolled-up damp newspaper or cloth tightly into the heel area; the pressure expands the heel counter gradually.
You can also apply a shoe stretching spray before inserting your stretcher, apply lightly and let it dry slightly first.
Do Tight Shoes Stretch Over Time on Their Own?
Yes, tight heels do stretch gradually with wear, but the amount varies by material and construction.
Leather stretches more than synthetics. Quality leather shoes typically stretch a half size over several months of regular wear.
The toe box usually stretches more than the heel area, since heel counters are reinforced to resist stretching.
Natural stretching takes months.
Still Standing® Spray offers another approach: spray your feet before wearing tight heels.
When Not to Stretch Heels at Home
Home stretching can buy a few millimeters of comfort, but it can't change a shoe's fundamental size and can permanently damage the wrong materials.
The material-by-material safety rules
Most online advice treats "shoes" as one material. They aren't, and failure modes differ sharply:
- Smooth full-grain leather: The most forgiving material. Handles damp stuffing, gentle heat, and sustained pressure well. Expect roughly a half-size of give over repeated sessions, not in one go.
- Patent leather: The glossy finish is a coating, and it cracks rather than stretches. Heat makes it worse. Avoid the hair dryer entirely; if you must try, use only the thick-sock method for short intervals and stop at the first sign of creasing.
- Suede and nubuck: Water causes tide marks and stiffens the nap. Skip all damp and freezer methods. Use dry stuffing and thick socks only, and brush the nap afterward.
The two-size test: when stretching won't work
Stretching buys comfort at the margins. It does not fix a shoe that is genuinely the wrong size. Use this quick test:
- The pinky test: If your smallest toe hangs over the footbed edge or is pinched against the side, the shoe is too narrow. Stretching won't add width where there's no material to give.
- The heel-slip test: If your heel slides out of the counter when you walk, the shoe is too long, and stretching the heel counter will make it worse, not better.
- The two-size rule: If the shoe is more than about one full size too small, no home method will close the gap. Return it, exchange it, or take it to a cobbler who can assess whether it's salvageable.
Structural red flags
Stop and reassess if any of these apply:
- The heel is wobbly, cracked, or separating from the sole.
- The sole is glued rather than stitched, and you plan to use heat, heat weakens adhesive.
- The shoe is vintage, irreplaceable, or borrowed.
A cobbler with a professional stretcher can apply controlled, even pressure home methods can't replicate and spot construction issues you'd miss, often cheaper than replacing a shoe you love.
The blister-prevention protocol while you test the fit
Stretching is iterative, and every test wearing can damage your feet. Protect them:
- Start at 10-15 minutes, not an hour. Check for hot spots the moment you feel warmth or rubbing.
- Use blister bandages or moleskin on known hot spots before the test, not after.
- Wear thin moisture-wicking socks during test wearings, thick socks are for stretching sessions, not fit checks.
Frequently Asked Questions
What should I do if my heels are tight?
Start by identifying whether the tightness is in the toe box, heel counter, or overall shoe width. Use the hair dryer method for quick softening, or try the freezer method overnight for sustained expansion. Wearing thick socks while breaking in the shoe at home helps mold the heel to your foot shape. If tightness persists after multiple stretching attempts, the shoe may simply not be your size. Still Standing® Spray can provide comfort during the break-in period without numbing your feet, allowing you to feel confident while testing the fit.
Do tight shoes stretch over time on their own?
Leather and suede heels do stretch gradually with wear, typically expanding a quarter to half size over several months. Synthetic materials stretch much less and may not change significantly. Active stretching methods like those described here speed up this process dramatically. For an upcoming event, do not rely on passive stretching alone; use heat and moisture techniques to accelerate expansion before your event date.
How can I make a homemade shoe stretcher?
Stuff damp newspaper, a wet washcloth, or plastic bags tightly into the toe box and heel areas of your heels. Leave overnight or for 24 hours to allow moisture to soften and expand the material. For targeted heel stretching, roll a damp cloth and insert it specifically into the heel counter. You can also freeze water in a plastic bag, place it inside the shoe, and let it expand as it freezes, the ice expansion naturally stretches the shoe from within.
Does the hair dryer method work for stretching shoes?
Yes, the hair dryer method is highly effective for quick softening. Apply heat on medium setting for 30-60 seconds while wearing thick socks inside the heels, focusing on tight areas like the toe box and heel. The heat softens the material, and the pressure from your foot and socks molds the shoe to your shape. For best results, wear the heels around your house for 15-30 minutes while they cool, which sets the new shape. Repeat as needed over several days for maximum expansion.
Tight heels don't have to mean painful feet. These home stretching methods work for most situations. Test each method carefully on your specific shoes and materials. When time is short or shoes are delicate, professional help or pain prevention products like Still Standing® Spray make more sense than risking damage. Your comfort and safety matter more than forcing an uncomfortable shoe to work.