
Last Updated: October 26, 2026
Quick Summary
To walk gracefully in high heels, land on the outer border of the heel first, roll through the sole toward your big toe, and push off from the ball of the foot. Keep steps short, stack your ears over your shoulders and hips, and let your arms swing naturally for balance.
- Practice heel-to-toe in place holding a counter for ten slow repetitions per foot.
- Give yourself at least two weeks of short daily practice in the exact pair you will wear.
- A two-inch block heel or wedge suits beginners better than a thin stiletto.
- Going down stairs, lead with the whole foot and use the handrail every time.
- On grass, walk on the balls of your feet and keep your steps short.
Table of Contents
- How to Walk Gracefully in High Heels: The Core Technique
- How to Walk in Heels for Beginners
- How to Practice Walking in Heels Before the Big Day
- How to Walk in Heels Without Pain
- How to Choose Comfortable High Heels
- Walking on Different Surfaces and in Real-World Situations
- Build Your Heel-Walking Routine Before Your Next Event
- Frequently Asked Questions
How to Walk Gracefully in High Heels: The Core Technique
Learning to walk gracefully in high heels comes down to three things: heel-to-toe landing, stacked posture, and a steady weight shift. Get those right and the shoe stops steering you. At Still Standing® Spray, we talk to brides, lawyers, dancers, and bridesmaids every week, and the women who look effortless are landing differently than you.
Most people clomp because they land flat-footed or on the ball of the foot. Grace comes from touching down on the outer border of the heel first, then rolling through the sole to the toe.
Graceful heel walking is a controlled heel-to-toe roll with your weight stacked over your arches, not a tiptoe walk. It looks elegant because it is stable, and it is stable because your body is aligned.
Heel-to-Toe Stepping, Explained
The heel-to-toe step is the foundation of every elegant walk in heels. Land on the outer edge of the heel, roll inward across the sole, then push off from the ball of the foot and toe, that push-off is where your stride gets its smoothness. Try it barefoot first: a hard slap means you are landing flat; a soft roll means you have it.
A few cues that help:
- Touch down heel first, on the outer border
- Roll toward your big toe, not straight down
- Push off the ball of the foot, not the toe tip
Posture and Body Alignment
Straighten your posture before you take a single step. Stand tall, pull your shoulders back and down, and stack your ears over your shoulders and hips. When your ribs sit over your pelvis, your weight distributes evenly through your feet; lean forward or arch your lower back and all your weight drives into the balls of your feet, the fastest route to burning, aching feet by hour two.
How to Walk in Heels for Beginners
Beginners should start with a lower heel, shorter steps, and a wall nearby. Learning to walk in heels is a skill, not a talent, the women who look natural have simply logged more hours in the shoe than you have. The mistake most beginners make is treating practice as a single event. A two-hour session the night before a wedding teaches your ankles nothing except that they hurt.
A Two-Week Progressive Practice Plan
Use this plan with the exact pair you plan to wear. If a stage feels wobbly, repeat it for another day or two rather than pushing forward.
Days 1-2: Static balance. Stand still next to a counter or wall for one minute, rest, repeat five times. Keep your weight centered over your arches, not your toes. This builds ankle stability before you ask your feet to move.
Days 3-4: Heel-to-toe in place. Holding the counter, shift your weight slowly from heel to ball to toe on one foot, then the other.
Days 5-7: Hallway walks with a hand on the wall. Walk heel-to-toe down a hallway for five minutes, one hand lightly touching the wall, steps short. Turn slowly at the end, turns are where beginners wobble most, so practice them deliberately.
Days 8-10: Wall-free walking on carpet. Drop the wall and walk the same hallway or a carpeted room for ten minutes. Carpet gives slightly under the heel, which is more forgiving than hardwood.
Days 11-12: Hard floors and stops. Move to tile or hardwood for ten minutes. Practice stopping smoothly, standing still for thirty seconds, then starting again, stopping and starting are separate skills from walking.
Days 13-14: Real-world simulation. Wear the shoes for a full hour while doing light tasks: folding laundry, making coffee, walking to the mailbox.
Three Beginner Mistakes to Avoid
- Starting in stilettos. A thin heel asks for ankle stability you have not built yet. A two-inch block heel or wedge lets you learn the roll without fighting for balance.
- Looking at your feet. It throws off your balance and your posture at once. Keep your gaze forward and trust the shoe.
- Walking fast to hide the wobble. Speed makes every wobble worse. Slow, deliberate steps look more graceful than fast, uncertain ones, and they give your ankles time to correct.
Once the hallway feels easy, move to a carpeted room and drop the wall. Then try a hard floor. If you want a deeper walkthrough for your first weeks in heels, our guide on how to wear high heels all day without pain covers the full routine.
How to Practice Walking in Heels Before the Big Day
Practice walking in heels before the event, not on the day of it. Give yourself at least two weeks, and wear the exact pair you plan to wear.
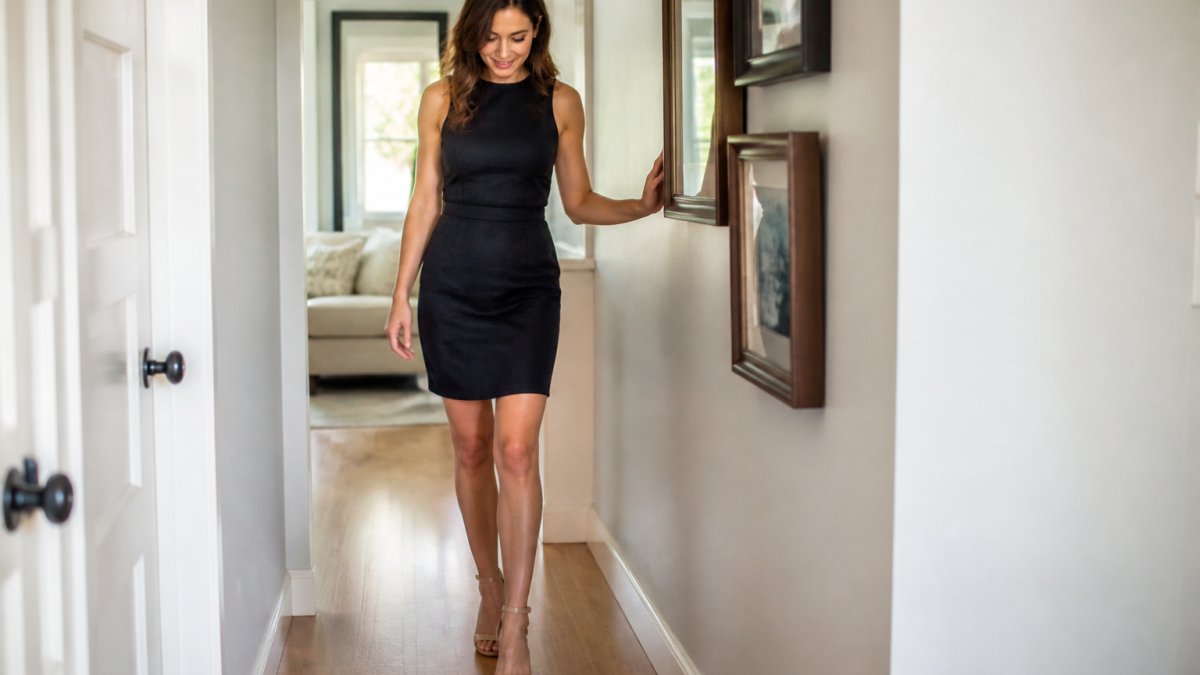
A simple practice plan that works for weddings, proms, and formal events:
- Days 1-3: Ten minutes in the shoes at home, heel-to-toe down a hallway.
- Days 4-7: Fifteen minutes, including turns and stopping smoothly.
- Days 8-11: Wear them while doing light tasks, like folding laundry or making coffee.
- Days 12-14: A full hour in the shoes, including standing still for long stretches.
Standing still is the part most people skip, and it is often harder than walking.
If your event is a wedding, our step-by-step guide on how to survive a wedding in heels walks through the whole day, from getting ready to the last dance.
How to Walk in Heels Without Pain
You can walk in heels without pain if you fix your step, limit your walking time, and support your feet before the ache starts. Pain in heels usually comes from three sources: bad weight distribution, long stretches of standing, and shoes that do not fit. Plan ahead for the parts of the day that hurt most: sit down for five minutes before an hour of standing at a reception, and wear flats for a long walk from the parking lot, changing at the door.
What helps in practice:
- Shift your weight from foot to foot while standing still
- Take sitting breaks before your feet start to throb
- Keep a travel-size comfort spray in your bag for touch-ups
Foot and Ankle Warning Signs to Watch
Some discomfort is normal after hours in heels; some signals mean you should take the shoes off and stay off them.
If pain continues after you are out of the shoes, or if you have diabetes or circulation problems, talk to a doctor or podiatrist.
For a deeper look at prevention, our article on how to stop feet from hurting in heels covers the full set of fixes.
How to Choose Comfortable High Heels
Comfortable high heels start with fit, not brand. Shop late in the day when your feet are at their largest, and buy for the bigger foot, a snug shoe at 10 a.m. is a painful shoe by 6 p.m.
Shoe fit checklist:
- There is a finger's width between your longest toe and the front of the shoe
- Your heel does not slip when you walk
- The widest part of your foot sits in the widest part of the shoe
Once you have the fit right, a comfort spray helps you stay in the shoes longer. Our foot comfort spray for ultimate high heels uses a cooling menthol formula with plant-derived ingredients, made without numbing agents.

How Heel Height and Shape Change Your Walk
Heel height and heel shape change your walking technique more than most guides admit. A two-inch block heel lets you walk almost normally. A six-inch stiletto asks for a shorter stride, more ankle stability, and a slower pace.
| Heel Type | Height Range | Walking Technique | Best For |
|---|---|---|---|
| Block heel | 2-3 inches | Near-normal heel-to-toe roll | All-day wear, beginners |
| Kitten heel | 1.5-2 inches | Natural stride, minimal adjustment | Workdays, travel |
| Wedge | 2-4 inches | Stable roll, less ankle work | Outdoor events, grass |
| Pump | 3-4 inches | Shorter steps, more weight shift | Office, formal events |
| Stiletto | 4-6 inches | Short steps, slow pace, strong core | Photos, short events |
Extreme heels and six-inch heels demand foot strength and ankle stability that take weeks to build. If you are walking in stilettos for a red-carpet event, practice in them first.
Walking on Different Surfaces and in Real-World Situations
Real-world walking is where graceful technique gets tested. Grass, cobblestone, stairs, and slick floors all change how you place your foot, and the technique that works on a carpeted hallway can fail on a wet sidewalk. Adjust deliberately rather than stiffening up and hoping.
Stairs
Stairs are the most common place people in heels feel unsafe, and going down is the risky direction. Going up, place the ball of your foot on the step and let your heel hang slightly off the edge; this keeps your weight forward and uses the stronger muscles of your calf and thigh. Going down, lead with the whole foot, use the handrail every time, and take one step at a time.
Slopes and Inclines
Walking uphill, shorten your stride and lean slightly forward from the ankles, not the waist. Your heel will want to lift early, so let it and push off from the ball of the foot. Walking downhill, take shorter steps, keep your weight back over your heels, and resist leaning forward, which drives all your weight into the toes and causes burning in the ball of the foot.
Grass and Uneven Ground
On grass, walk on the balls of your feet and keep your steps short, the heel sinks into soft ground, so you roll forward faster than you expect. A wedge or block heel distributes weight over a wider area and sinks less than a stiletto, which is why outdoor ceremonies favor them. On cobblestone or gravel, slow down and place each foot deliberately; the uneven surface asks your ankle to correct constantly, and speed removes the time it needs to do that.
Slick Floors
For slick floors, shorten your stride and land flatter rather than on the outer heel edge. A polished lobby floor or marble ballroom gives little traction, and a long heel-first stride is exactly the motion that causes a slip. Keep your weight centered, steps small, and avoid sudden turns. If the floor is wet, treat it like ice: slow down and use a handrail or a companion's arm where available.
Real-World Situations to Plan For
- Long walks from parking: wear flats and change at the door. The walk across a parking lot is where most event-day foot pain starts.
- Standing in lines: shift your weight from foot to foot every minute or two rather than locking your knees.
- Dancing: keep steps small and stay near a wall or table. Dancing in heels is a different skill from walking in them, and the small-step rule matters more, not less.
Carpet is the easiest surface, which is why it is a good place to practice. Once you can walk confidently on carpet, add hard floors, then stairs, then outdoor ground, in that order, stacking them gradually is how the technique becomes automatic.
Build Your Heel-Walking Routine Before Your Next Event
A heel-walking routine beats last-minute panic every time. Two weeks of short daily practice, the right shoe fit, and a plan for long standing stretches will do more for your walk than any single tip.
Here is what we recommend:
- Practice heel-to-toe for ten minutes a day in the shoes you will wear
- Build foot strength with toe raises and ankle circles
- Break in new shoes at home, never on the day
Frequently Asked Questions
Is it better for heels to be loose or tight?
Neither extreme works. A heel that is too loose lets your foot slide forward, so your toes jam into the front and your heel slips out of the back with every step. A heel that is too tight pinches the widest part of your foot and restricts circulation. Aim for a snug fit at the heel counter and across the ball of your foot, with about a half inch of space at the toe. Shop late in the day when feet are at their largest, and walk a few steps before buying.
Should I put my heel or toe down first when wearing heels?
Heel first, then toe. Land on the outer border of the heel, roll smoothly through the ball of the foot, and push off from the toe. This heel-to-toe pattern spreads weight distribution across the whole foot instead of dumping it onto the toes, which is what causes burning and cramping. Walking flat-footed or toe-first makes your steps look heavy and throws off your balance, especially in stilettos.
How long does it take to learn how to walk in high heels?
Most beginners notice a real difference after two to three weeks of short daily practice sessions, around 10 to 15 minutes each. Start in low heels on carpet, then move to harder floors and higher heels as your ankle stability and foot muscles strengthen. If you are prepping for a wedding or event, begin at least a month ahead so your feet adapt to the shoe and your stride becomes automatic rather than something you think about.
How can I walk in high heels without my feet hurting?
Three things matter most: correct heel-to-toe technique, a shoe that actually fits, and prepping your feet before you put the heels on. Take shorter steps, shift weight smoothly from heel to toe, and stand tall with your shoulders back. A cooling foot comfort spray applied before you slip your shoes on can help keep feet feeling refreshed through long hours. For events, bring a travel-size bottle for touch-ups and plan seated breaks every couple of hours.
Walking gracefully in heels is a skill you can build, and you do not have to suffer to get there. Still Standing® Spray makes a non-numbing foot comfort spray with a cooling menthol formula, a portable bottle that fits in a clutch, and a 30-day money-back guarantee. Get started with Still Standing® Spray and walk into your next event steady, comfortable, and confident.
