
Last Updated: October 22, 2026
Quick Summary
To prevent blisters high heels, start with properly fitted shoes that reduce friction by 50% or more, break in gradually over several weeks with short intervals, and use protective products like gel pads and heel grips at pressure points. Control moisture with moisture-wicking socks and antiperspirant, apply comfort spray before wearing heels, and manage sweat during long events.
- Proper shoe fit reduces friction by 50% or more compared to ill-fitting heels.
- Break in new heels gradually: start with 30 minutes indoors, then add 15 minutes every few days over several weeks.
- Sweat increases friction by 300%, so use moisture-wicking socks and antiperspirant to reduce blister risk.
- Apply protective products like heel grips, gel pads, and moleskin at specific friction points where your shoes rub.
- Use comfort spray on clean, dry feet 30 seconds before putting on shoes to create a protective layer.
Table of Contents
- Why High Heels Cause Blisters: Understanding Friction and Pressure Points
- Step 1: Choose Properly Fitted Shoes to Prevent Heel Slippage
- Step 2: How to Break in High Heels Gradually
- Step 3: How to Stop Shoes From Rubbing Heels With Protective Products
- Step 4: Reduce Friction With Moisture Control and Socks
- Step 5: Apply Comfort Spray Before Wearing Heels
- Best Blister Pads for Heels and When to Use Them
- High Heel Blister Treatment and Aftercare
- Frequently Asked Questions
Why High Heels Cause Blisters: Understanding Friction and Pressure Points
High heels create the perfect storm for blisters: friction, pressure, and moisture. Understanding why is your first step toward learning how to prevent blisters high heels.
In heels, your foot slides forward into the toe box while your heel lifts away from the back of the shoe, creating constant rubbing.
The pressure points are predictable: heels rub against the shoe back, toes get squeezed at the front, and the sides of your feet press against rigid walls.
That's why you must prevent blisters high heels with a multi-step approach: no single product works.
Still Standing® Spray helps heel wearers extend comfortable wear time by addressing these friction points directly. Start your prevention routine before you put on your shoes.

Step 1: Choose Properly Fitted Shoes to Prevent Heel Slippage
Proper fit is non-negotiable: a correctly fitting shoe reduces friction by 50% or more versus an ill-fitting pair. Yet most people choose heels by looks, not performance.
Start with heel slippage. If your heel moves up and down inside the shoe, your foot slides forward and back with every step, causing blisters at the heel and toe.
To check fit, stand in the shoes and slide one finger between your heel and the shoe back: you should feel light contact, not a gap.
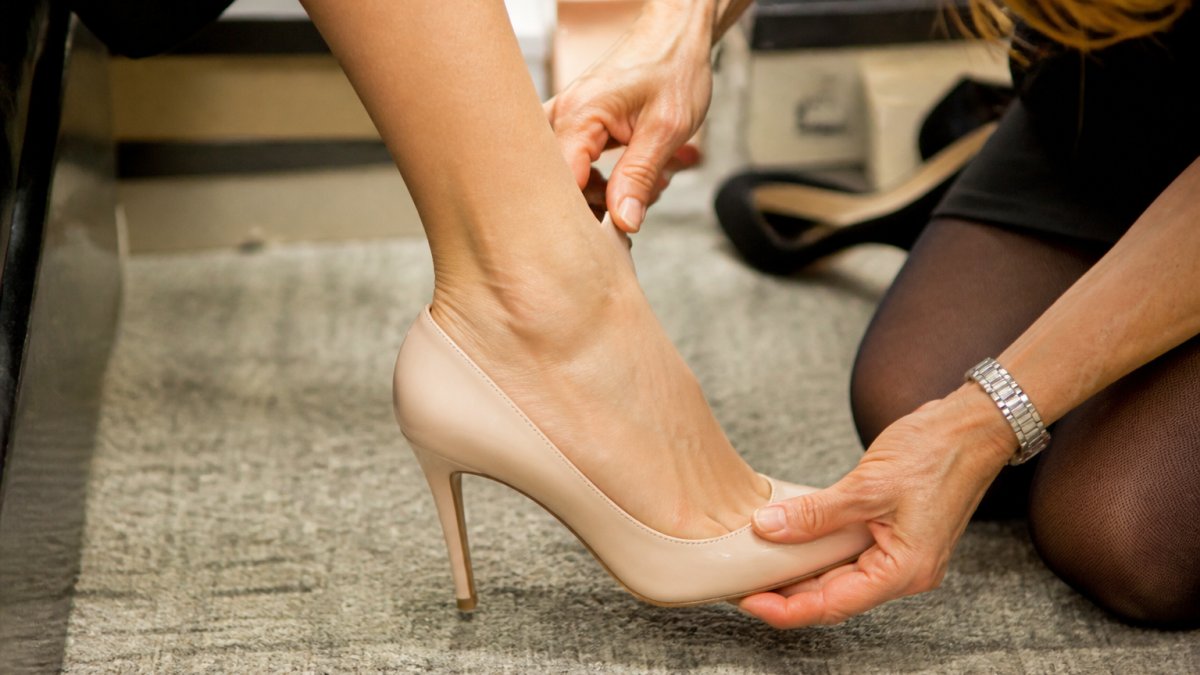
Fit checks for high heels
High heels require specific fit checks because the angle of your foot changes everything.
The heel check: Stand and press your foot forward slightly.
The toe box check: You need a thumb's width from your longest toe to the shoe end.
The width check: Your foot should not bulge over the shoe sides. If it does, you need a wider width; side pressure causes blisters that hurt for days.
The arch check: The shoe's arch should align with yours. If it's too far forward or back, your foot shifts inside the shoe with every step, creating friction.
The instep check: The shoe should hug your instep snugly. Loose insteps let your whole foot slide around, multiplying friction points.
Prevention for different foot shapes
Your foot shape determines which areas are most blister-prone.
Wide forefeet with narrow heels: You face toe pressure and heel slippage.
High arches: Your arch doesn't touch the insole, so your heel and ball of foot carry all your weight.
Flat feet: Your entire foot contacts the shoe, so friction happens across a wider area. Choose soft, flexible materials; stiff shoes create multiple hotspots.
Narrow heels on a wide foot: The most common blister scenario. Your heel slides while your forefoot is squeezed. Use heel grips and possibly a wider size with toe box padding.
Bony ankles and prominent heel bones: These protrusions create pressure points. Add extra padding at the back of the shoe; strategically placed moleskin or gel pads prevent blisters before they start.
Step 2: How to Break in High Heels Gradually
Breaking in high heels properly cuts blister risk in half, yet most people wear new heels for hours on the first outing, a recipe for severe blisters.
Start with 30 minutes indoors, walking, standing, and sitting. Identify uncomfortable spots, they'll become blisters if you don't address them.
This works because skin adapts: repeated low-level pressure thickens it slightly, and thickened skin resists blistering, while sudden intense pressure tears skin immediately.
During break-in, wear the shoes with socks or hosiery. Thicker material reduces friction. Once the shoes are broken in, you can switch to thinner options if desired.
Step 3: How to Stop Shoes From Rubbing Heels With Protective Products
Even well-fitting, broken-in shoes can cause rubbing during long wear. This is where protective products make the difference.
How to stop shoes from rubbing heels requires understanding what each product does and where to use it.
Gel pads and cushions absorb impact and reduce friction at pressure points.
Blister dressings create a protective barrier between skin and shoe. They prevent friction from reaching your skin.
Lubricants reduce friction by creating a slippery surface. They work best on areas that slide against the shoe.
Moleskin is thick fabric that adheres to your skin. It protects vulnerable areas from rubbing.
Heel grips tighten the fit at your heel, preventing slippage that causes friction.
The key is using the right product in the right location.
Choosing and placing blister-prevention products correctly
Location matters more than the product itself. Place products where friction actually occurs.
For heel blisters: Use heel cups, gel pads, or moleskin at the back of the shoe. If your heel is slipping, add a heel grip first.
For toe blisters: Use gel spot pads or moleskin on the tops of your toes where they press against the shoe.
For blister-prone areas you know from past experience: Apply protective tape or moleskin before putting on your shoes. Don't wait until you feel pain.
For moisture-prone areas: Use moisture-wicking pads or apply lubricant. Moisture increases friction. Reducing moisture reduces blister risk.
Application tips:
- Clean and dry your skin completely before applying any product
- Apply products to your skin, not the shoe
- Smooth out air bubbles and wrinkles
- Test the fit with socks on before wearing out
- Bring backup products for reapplication during long events
Still Standing® Spray works differently than these physical barriers. Our non-numbing formula combines cooling menthol with plant-derived ingredients to help soothe and refresh tired feet.
Step 4: Reduce Friction With Moisture Control and Socks
Moisture is friction's best friend. Sweat increases friction by 300%.
Foot Comfort Spray for Ultimate High Heels →
Controlling moisture is as important as controlling pressure and fit. Dry feet blister less.
Start with socks. Cotton socks absorb sweat and reduce friction.
Moisture-wicking socks are even better than cotton. They pull sweat away from your skin and dry quickly.
Avoid silk or thin nylon socks. They don't absorb moisture.
Change your socks during long events. After 4-6 hours, your socks are saturated. Fresh socks reduce moisture immediately.
Apply antiperspirant to your feet the night before wearing heels. It reduces sweat production by 50-80% (pubmed.ncbi.nlm.nih.gov).
Let the antiperspirant dry completely before putting on socks.
During the event, bring a small towel or blotting papers. Dry your feet every hour if possible.
Step 5: Apply Comfort Spray Before Wearing Heels
A comfort spray applied before putting on your heels creates a protective layer on your skin.
The best time to apply comfort spray is right before putting on your shoes. Your feet should be clean and completely dry.
Let the spray dry for 30 seconds before putting on socks or shoes. This ensures it forms a complete protective layer.
Still Standing® Spray is designed specifically for this purpose. Our non-numbing formula combines cooling menthol with plant-derived ingredients. It helps your feet stay comfortable without deadening sensation.
The 3.4 fl oz full-size bottle is ideal for your primary application before events.
For events where you'll be wearing heels all day, the travel-size 0.5 fl oz bottle fits in your clutch or pocket.

Best Blister Pads for Heels and When to Use Them
Blister pads come in different types. Each works best in specific situations.
Gel pads are soft, cushioned, and absorb impact. Use them at your heel and ball of foot.
Moleskin pads are thick, durable fabric that sticks to your skin. They're ideal for protecting specific hotspots.
Blister dressings are thin, flexible, and designed specifically for blister prevention.
Heel cups are specially shaped to fit your heel. They prevent slippage and reduce impact.
Spot cushions are small, targeted pads for specific pressure points. Use them where other pads are too large.
The best blister pads for heels combine protection with minimal bulk. Your shoes should still fit properly after applying pads.
When to use blister pads:
- During break-in of new shoes
- For events longer than 4 hours
- At known blister hotspots
- When wearing heels for the first time in months
- During high-activity events like dancing or standing
When to skip blister pads:
- When they make your shoes too tight
- When your shoes are already well-broken-in and fit properly
- When you're using a comfort spray like Still Standing®
- For short events (under 2 hours)
Many heel wearers use a combination approach.
High Heel Blister Treatment and Aftercare
If you do develop a blister despite prevention efforts, proper treatment prevents infection and speeds healing.
For a blister that hasn't popped:
Don't pop it yourself. The fluid inside protects the skin underneath.
Keep the area clean and dry. Wash with soap and water daily. Pat dry gently.
For a blister that has popped:
Clean the area immediately with soap and water. Pat dry very gently. Don't scrub.
Apply an antibiotic ointment to prevent infection. This is important. Blisters are open wounds.
Cover with a sterile blister dressing or bandage.
Avoid wearing heels on that foot until the blister is completely healed.
For recurring blisters:
Recurring blisters are a sign that you need to change your approach.
Still Standing® Spray helps keep your feet comfortable throughout long events.
Preventing blisters from wearing high heels doesn't mean sacrificing style or comfort. The seven-step approach we've covered here addresses every major cause of heel blisters: poor fit, inadequate break-in, friction, moisture, and lack of protective measures.
Frequently Asked Questions
How do I prevent blisters from high heels if I wear them multiple times a week for work?
Rotate your heels to avoid repeated friction on the same hotspots, and apply Still Standing® Foot Comfort Spray before each wear. Use blister pads on known problem areas like heels and toes. Wear moisture-wicking socks or go barefoot if your shoes allow it. The key is consistency: prepare your feet before putting on heels every time, not just for special events. A single 3.4 fl oz bottle typically lasts 4-6 weeks with regular use, so budget accordingly for frequent wear.
Will a foot comfort spray actually work if it doesn't numb my feet?
Yes. Still Standing® Foot Comfort Spray uses cooling menthol and plant-derived ingredients to soothe and refresh tired feet, reducing the sensation of discomfort without deadening feeling. This approach is safer because you maintain natural sensation, so you can feel the ground and avoid dangerous falls. The cooling effect and friction reduction work together to prevent the pain that leads to blisters in the first place, rather than masking pain after it starts.
What's the difference between blister pads and a foot comfort spray, do I need both?
They work together. Blister pads provide targeted cushioning and protection at high-friction areas like heels and toes, while a foot comfort spray like Still Standing® cools and soothes your entire foot before you put on heels. Use the spray as your base layer of protection, then add blister pads to specific hotspots. This combination addresses friction from multiple angles: the spray helps keep your feet feeling comfortable and refreshed, and pads shield the most vulnerable pressure points. For extended wear (weddings, all-day events), both give you the best results.
How soon should I apply foot comfort spray before putting on my high heels?
Apply Still Standing® Foot Comfort Spray immediately before putting on your heels, ideally within 2-3 minutes. This timing ensures the cooling menthol formula is active when you step into your shoes. The spray works best when applied to clean, dry feet. Spray evenly across the soles, heels, and any areas prone to rubbing or pressure. If you'll be wearing heels for more than 4-5 hours, carry the travel-size bottle (0.5 fl oz) for a quick reapplication during the day or evening.
