
Table of Contents
- Why Wedding Day Foot Pain Hits Harder Than Any Other Event
- Step 1: Choose Comfortable Bridal Shoes Before Anything Else
- Step 2: Learn How to Break In Wedding Shoes Before the Big Day
- Step 3: Pick Wedding Shoe Insoles and Test Them With the Shoe
- Step 4: Build a Wedding Heel Pain Relief Kit for the Day
- Step 5: Follow a Timed Wedding-Day Foot-Care Plan
- Step 6: Match Your Plan to the Venue and the Dancing
- Step 7: Know When Foot Pain Needs a Doctor
- Frequently Asked Questions
Last Updated: October 12, 2026
Why Wedding Day Foot Pain Hits Harder Than Any Other Event
Wedding day foot pain relief for brides starts with understanding why this day is different from every other. You stand for hours, often on hard floors, in shoes chosen for looks first. By the reception, most brides feel every step.
At Still Standing® Spray, we hear the same story from brides again and again. The shoes fit fine in the store. Then hour four arrives.
What Changes When You Stand for Six Hours
A typical wedding day stacks standing, walking, and dancing into one long stretch. Ceremony. Photos. Cocktail hour. Reception.
Your feet were not built for that in heels. Pressure shifts to the ball of your foot and toes. Blood pools. Swelling starts.
Most brides notice it first as a dull ache. Then rubbing. Then real pain.
Step 1: Choose Comfortable Bridal Shoes Before Anything Else
Comfortable bridal shoes are the foundation of every other fix on this list. Pick wrong, and no insert or spray can fully rescue the day.
The American Podiatric Medical Association's shoe fit guidance recommends shopping late in the day, when feet are largest. Your feet swell during the day, and they will swell at your wedding too.
Heel Height, Heel Shape, and Toe-Box Room
Lower heels reduce forefoot pressure. A block heel spreads weight better than a stiletto. Both matter more than most brides expect.
| Shoe Feature | Why It Helps | What to Look For |
|---|---|---|
| Heel height | Less angle means less ball-of-foot pressure | Under 2 inches for the ceremony |
| Heel shape | Wider base means better stability | Block or kitten heel |
| Toe-box room | Prevents pinching and blisters | Room to wiggle toes |
| Cushioning | Softens every step | Padded heel and forefoot |
| Arch support | Reduces heel pain | Built-in or added insole |
Arch Support and Cushioning to Look For
Press your thumb into the footbed. If it barely gives, your feet will feel every step by hour three.
Look for a cushioned heel cup and a slight rise under the arch. These two features do more for all-day wear than any decorative detail.
Step 2: Learn How to Break In Wedding Shoes Before the Big Day
Learning how to break in wedding shoes takes about two weeks of short wears. Skip this step and you risk blisters on the one day you cannot sit down.
Start indoors. Wear them for 20 minutes on carpet. Then 45. Then an hour.
- Wear them while doing chores around the house
- Add thin socks for the first few wears
- Walk on different surfaces: tile, carpet, pavement
- Bring them to your final dress fitting
- Stop if you feel a hot spot forming
Step 3: Pick Wedding Shoe Insoles and Test Them With the Shoe
Wedding shoe insoles only work when they match the shoe. A thick gel insert in a narrow pump pushes your toes into the front. That causes more pain, not less.
Test every insert the same way:
- Slide it into the shoe and press down along the whole footbed
- Walk 50 steps on a hard floor
- Check for bunching at the arch or heel
- Confirm your toes still have wiggle room
- Repeat with your second pair of shoes
A common mistake is buying inserts the week of the wedding. Give yourself at least two weeks to test them.
Step 4: Build a Wedding Heel Pain Relief Kit for the Day
Wedding heel pain relief depends on what you have within arm's reach. Build the kit a week ahead and hand it to a bridesmaid.
What Goes in the Emergency Foot-Care Kit
- Blister patches and small bandages
- Friction stick or balm
- Gel heel pads and forefoot pads
- A small foot comfort spray
- Foldable flats for the last hour
- A spare pair of tights or socks
Step 5: Follow a Timed Wedding-Day Foot-Care Plan
A timed plan keeps your feet ahead of the pain instead of chasing it. The goal is not to avoid every twinge, it is to never let a hot spot turn into a blister you feel for the rest of the night.

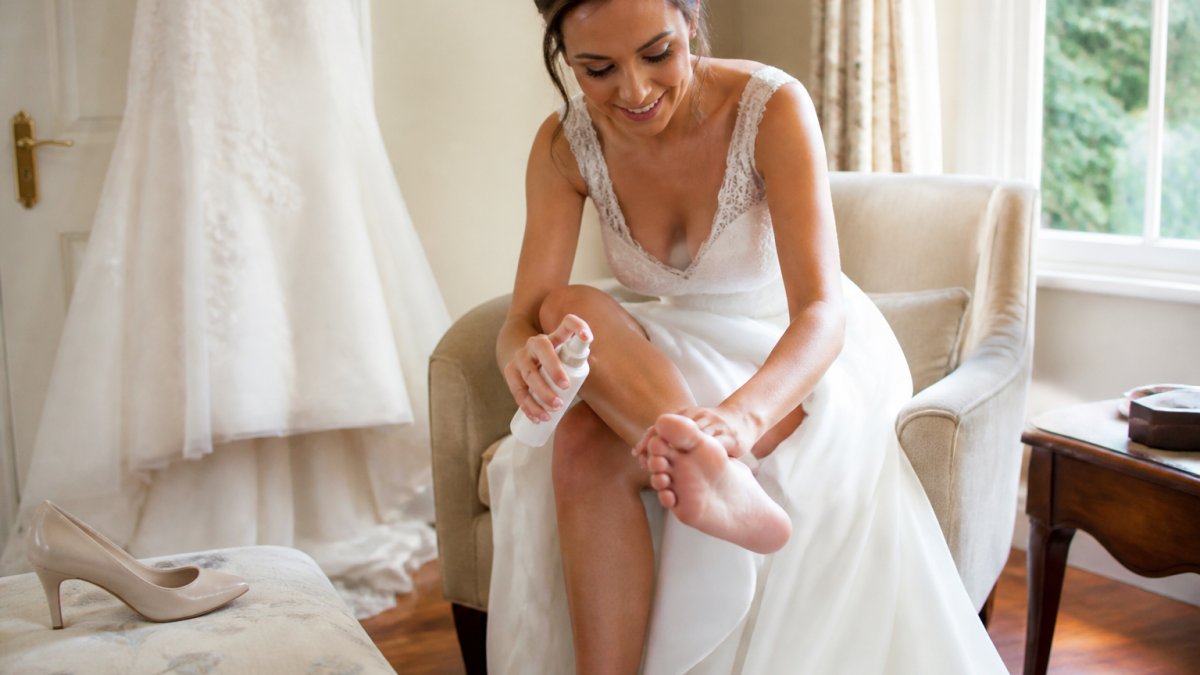
Getting Ready (T-minus 2 hours)
Shower and dry your feet completely, including between the toes. Damp skin plus friction is how blisters start. Apply your foot comfort spray now, before your first pair of shoes goes on, not after you feel pain. Slip your tested inserts into the ceremony shoes and confirm they are seated flat with no bunching at the arch.
First Hour in Shoes (before the ceremony)
Wear your ceremony shoes around the getting-ready room for 15 to 20 minutes before you walk down the aisle. This is your last real test. If a seam rubs or a strap digs, you still have time to swap in a pad or change shoes. Do not skip this window because the schedule feels tight, it is the cheapest insurance you have.
Foot Comfort Spray for Ultimate High Heels →
Ceremony and Formal Photos
Standing still is harder on your feet than walking, because the same pressure points take load without shifting. During the ceremony, shift your weight subtly from foot to foot when you can. Between photo groupings, sit whenever the photographer resets. Five minutes off your feet every 45 minutes does more than any product.
Cocktail Hour (the first real break)
This is your first scheduled shoe change if you have a second pair. Sit down, take both shoes off, and let your feet cool for at least five minutes. Elevate them above heart level if a chair or ottoman allows, this is the single most effective way to push back swelling. Reapply spray and re-seat your inserts before you stand up.
Reception and Dancing
Reapply spray at the start of the reception, then again at roughly the halfway point of dancing, for most weddings, that is about 90 minutes in. If you feel a hot spot forming, stop and treat it immediately with a friction stick or blister patch. Do not wait for the next song. A hot spot treated in 30 seconds stays a hot spot; one ignored for an hour becomes a blister.
Last Hour
Change into flats or your backup pair. This is not a concession, it is the plan working. No one remembers your shoes. Everyone remembers your face.
Step 6: Match Your Plan to the Venue and the Dancing
Venue and activity change what your feet need. A garden ceremony on grass needs a wider heel. A ballroom with marble floors needs more grip and cushioning.
Ask yourself three questions:
- Will I walk on grass, gravel, or uneven ground?
- How many hours will I actually be standing?
- Will there be a lot of dancing?
A beach or outdoor wedding calls for a block heel or a dressy flat. A hotel ballroom allows a higher heel, but bring backup shoes for the dancing hours.
Step 7: Know When Foot Pain Needs a Doctor
Some foot pain is not a shoe problem. It is a medical one. The tricky part is that wedding-day discomfort and a condition that needs care can feel similar at first, so it helps to separate them by pattern rather than by how much they hurt.
Ordinary Shoe Discomfort vs. Pain Worth Assessing
Ordinary discomfort follows a predictable pattern: it shows up late in the day, it eases when you take the shoes off, and it is tied to a specific shoe or a specific spot where something rubs.
A useful rule of thumb: if the pain is gone within an hour of being barefoot and off your feet, it is almost certainly a shoe-and-load problem you can manage with fit, cushioning, and breaks. If it is still there the next morning, that is your signal to get it looked at.
Symptoms That Should Not Be Ignored
See a doctor before the wedding if you notice any of these:
- Sharp heel pain with the first steps of the morning, which tends to ease after a few minutes and then return after sitting, a pattern often associated with plantar fasciitis
- Numbness, tingling, or burning that does not go away when you change shoes
- Swelling that lasts more than a day, or swelling in one foot only
- Pain that continues when you are barefoot or at rest
- A sudden, sharp pain during activity rather than a gradual ache
These signs can point to plantar fasciitis, a stress injury, or another condition that a shoe change alone will not fix. The National Institute of Arthritis and Musculoskeletal and Skin Diseases explains common foot and ankle conditions and when to seek care.
What to Do If Pain Appears Close to the Wedding
If you are inside two weeks of the date, do not start a new break-in routine or a new insert. Changing what your feet are used to this late can create new problems. Instead, bring the shoes you plan to wear to the appointment, describe how many hours you will be standing, and ask what is safe to use on the day.
The brides who stay comfortable all night are not tougher. They planned ahead, tested their shoes, treated hot spots early, and knew the difference between a shoe problem and a foot problem. Preparation beats willpower every time. ::: Selecting the right foundation for your stride ensures that even the most elegant courthouse ceremony remains grounded in comfortable wedding shoes.
Frequently Asked Questions
What can I do if my wedding shoes start hurting during the reception?
Sit down, take the shoe off, and check for a folded insole, a pebble, or a strap digging in. Reapply a foot comfort spray like Still Standing® to the sole and heel, then slide the shoe back on slowly. If the pain is sharp rather than dull, switch to your backup flats for the next two songs and put the heels back on once the pressure eases.
Are insoles helpful for wedding shoes?
Yes, if you test them in the actual shoe first. A gel or foam insole adds cushioning under the ball of the foot and can reduce forefoot pressure, but a thick one can push your heel out of the shoe or crowd the toe box. Buy the insole, trim it to fit, and wear it through at least two full dress rehearsals before the wedding.
How should I break in wedding shoes before the big day?
Start three to four weeks out. Wear the shoes indoors for 20 minutes on day one, then add 15 to 20 minutes every other day until you can wear them for two straight hours. Wear them on carpet first, then on hard floors. Add your insoles during these sessions so the shoe molds around the full setup you will wear on the day.
When should I change out of my wedding heels?
Plan the swap around your timeline, not your pain threshold. Most brides do best changing into reception shoes right after the first dance and toasts, roughly three to four hours into wearing heels. Keep the heels nearby for photos. If you have plantar fasciitis or get severe swelling after two hours, make the change earlier and wear block heels or flats for the rest of the night.
Your wedding day should not end with you sitting out the last dance because your feet gave up. Still Standing® Spray helps brides stay on their feet from the first step down the aisle to the final song. Our non-numbing formula uses cooling menthol, comes in a portable bottle for touch-ups, and is backed by a 30-day money-back guarantee. Get started with Still Standing® Spray and enjoy your wedding in comfort.